How Do You Add a Printer to Your Computer?
Last Updated: September 23, 2026
⚠️ Educational Notice: This guide provides independent instructions for adding printers to computers. For manufacturer-specific support, please contact your printer manufacturer directly. This content is for informational purposes only.
Introduction
Adding a printer to your computer allows you to manage documents, photos, and other files efficiently and conveniently. Whether you are using a USB connection or a wireless network, the setup process can typically be completed in a few straightforward steps. Proper printer configuration ensures reliable printing and access to all advanced features.
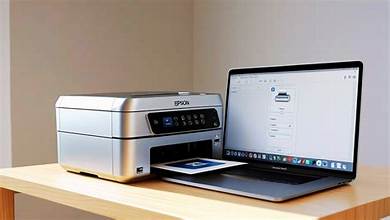
Professional printer setup and installation process
Understanding Printer Connection Types
Before you begin the installation process, it's important to understand the different ways you can connect a printer to your computer:
🔌 USB Connection
Direct Cable Connection
Fastest setup, most reliable, limited by cable length
📡 Wireless/WiFi
Network Connection
Flexible placement, shared access, requires WiFi setup
🔗 Bluetooth
Short-Range Wireless
Mobile device friendly, limited range, slower speeds
🌐 Network/Ethernet
Wired Network Connection
Stable, shared access, requires network setup
Visual Step-by-Step Printer Installation Guide
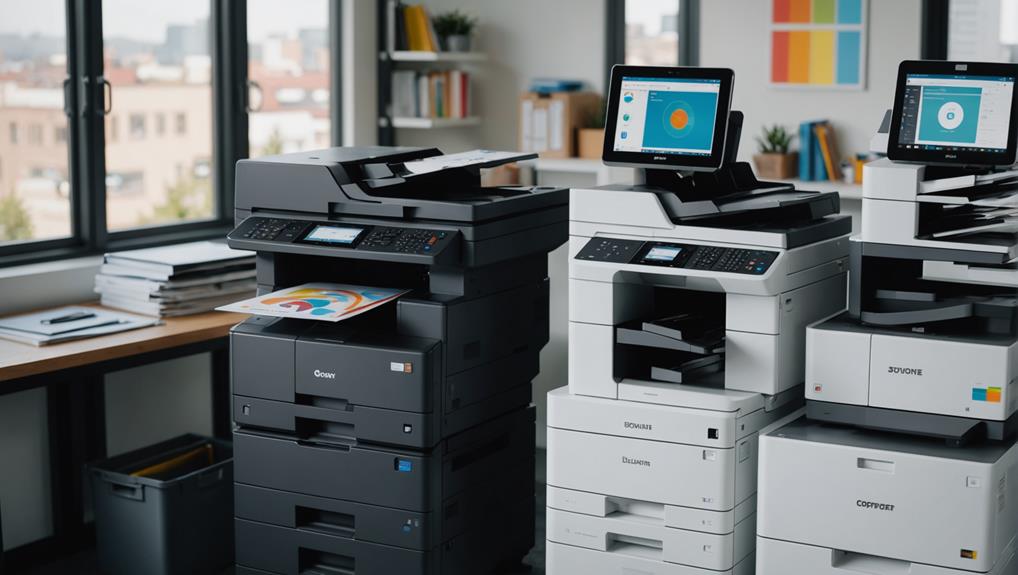
Various printer types and connection options available
Step 1: Select Connection Type
Choose your connection method:
- Local USB: Direct connection via USB cable to your computer
- Network/Wireless: Connection through your WiFi network
- Bluetooth: Wireless connection for mobile devices and laptops
- Ethernet: Wired network connection for office environments
Decision Factors:
- Distance from computer to printer location
- Number of users needing access
- Printer capabilities and features
- Your network infrastructure
- Mobility requirements
Step 2: Install Printer Driver
Select your manufacturer and driver version:
Popular Printer Manufacturers:
Hewlett-Packard
Canon Inc.
Seiko Epson
Brother Industries
Xerox Corporation
Ricoh Company
Driver Installation Process:
- Visit the manufacturer's official support website
- Search for your printer model number
- Select your operating system (Windows 10/11, macOS, Linux)
- Download the latest driver version
- Run the installer and follow on-screen instructions
- Restart your computer when prompted
- Connect the printer via USB or network
Detailed Setup Instructions by Connection Type
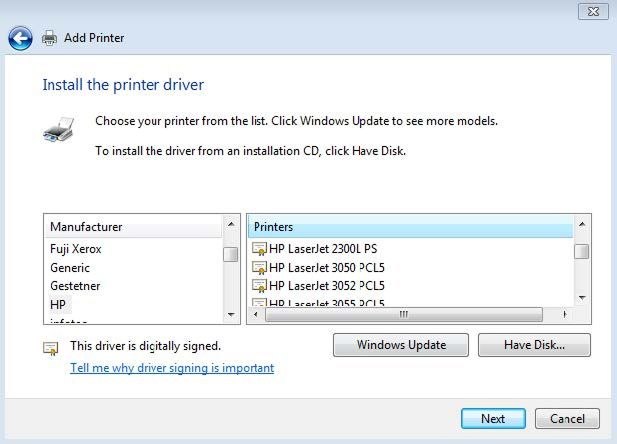
Windows printer driver installation process
USB Printer Setup (Windows)
- Prepare the Printer: Unpack the printer and remove all protective materials
- Install Ink/Toner: Install ink cartridges or toner according to manufacturer instructions
- Download Driver: Visit manufacturer's website and download the latest driver
- Run Installer: Execute the driver installer and follow on-screen prompts
- Connect USB Cable: Plug the USB cable into your computer and printer
- Windows Detection: Windows will automatically detect the printer
- Complete Installation: Follow any remaining setup prompts
- Print Test Page: Print a test page to verify functionality
USB Printer Setup (Mac)
- Prepare the Printer: Unpack and install ink/toner cartridges
- Download Driver: Visit manufacturer's website for Mac drivers
- Install Driver: Run the installer and follow instructions
- Connect USB: Plug USB cable into Mac and printer
- System Recognition: Mac will automatically recognize the printer
- Open System Preferences: Go to System Preferences > Printers & Scanners
- Verify Installation: Your printer should appear in the list
- Test Print: Print a test page to confirm setup
Wireless/WiFi Printer Setup (Windows)
- Prepare Printer: Unpack and install ink/toner cartridges
- Power On: Turn on the printer and let it fully boot
- Access WiFi Menu: Use printer's control panel to access WiFi settings
- Select Network: Choose your WiFi network from the list
- Enter Password: Input your WiFi password (case-sensitive)
- Confirm Connection: Printer will connect to your network
- Note IP Address: Write down the printer's IP address shown on display
- Download Driver: Get the latest driver from manufacturer's website
- Run Installer: Execute the driver installer
- Select Connection Type: Choose "Network" or "Wireless" during installation
- Enter IP Address: Input the printer's IP address when prompted
- Complete Setup: Finish the installation process
- Test Print: Print a test page to verify connection
Wireless/WiFi Printer Setup (Mac)
- Prepare Printer: Unpack and install ink/toner cartridges
- Power On: Turn on the printer and let it fully boot
- Access WiFi Menu: Use printer's control panel to access WiFi settings
- Select Network: Choose your WiFi network
- Enter Password: Input your WiFi password
- Confirm Connection: Printer connects to network
- Download Driver: Get Mac driver from manufacturer's website
- Install Driver: Run the installer and follow prompts
- Open System Preferences: Go to System Preferences > Printers & Scanners
- Click Add Button: Click the "+" button to add a new printer
- Select Printer: Your wireless printer should appear in the list
- Add Printer: Click "Add" to complete the setup
- Test Print: Print a test page to confirm
Printer Manufacturers: Features and Considerations
HP (Hewlett-Packard)
- Strengths: Wide product range, excellent driver support, user-friendly setup
- Popular Models: DeskJet, OfficeJet, LaserJet series
- Setup Time: 15-30 minutes typically
- Driver Availability: Excellent for Windows and Mac
- Support Resources: Comprehensive online documentation
Canon
- Strengths: High-quality photo printing, reliable performance, good wireless support
- Popular Models: PIXMA, imageCLASS series
- Setup Time: 20-35 minutes typically
- Driver Availability: Good support for major operating systems
- Support Resources: Detailed setup guides available
Epson
- Strengths: Excellent color printing, innovative features, reliable drivers
- Popular Models: WorkForce, Expression series
- Setup Time: 15-25 minutes typically
- Driver Availability: Strong support across platforms
- Support Resources: Comprehensive online support
Brother
- Strengths: Affordable, reliable, good for small offices
- Popular Models: HL, MFC series
- Setup Time: 10-20 minutes typically
- Driver Availability: Good driver support
- Support Resources: Adequate documentation available
Comparison: Connection Types
| Connection Type | Setup Time | Speed | Reliability | Shared Access | Best For |
|---|---|---|---|---|---|
| USB Direct | 10-15 min | Very Fast | Excellent | No | Single user, desktop |
| WiFi/Wireless | 20-30 min | Fast | Good | Yes | Multiple users, mobile |
| Bluetooth | 15-20 min | Moderate | Fair | Limited | Mobile devices, laptops |
| Ethernet | 15-25 min | Very Fast | Excellent | Yes | Office networks, high volume |
Pros and Cons of Each Connection Type
USB Connection
✅ Advantages
- Fastest setup process
- No network configuration needed
- Most reliable connection
- No WiFi password required
- Works offline
- Lowest latency
❌ Disadvantages
- Limited by cable length
- Single computer access only
- Cable clutter
- Not mobile-friendly
- Requires physical proximity
- Less flexible placement
Wireless/WiFi Connection
✅ Advantages
- Multiple user access
- Flexible printer placement
- No cable clutter
- Mobile device support
- Remote printing capability
- Scalable for offices
❌ Disadvantages
- Longer setup process
- WiFi password required
- Network dependency
- Potential connectivity issues
- Signal strength matters
- Slightly slower than USB
Troubleshooting Common Installation Issues
Driver Installation Fails
- Ensure you downloaded the correct driver for your OS version
- Disable antivirus temporarily during installation
- Run installer as Administrator (Windows)
- Clear temporary files before installing
- Restart computer and try again
- Download driver from manufacturer's official website only
Printer Not Detected
- Verify USB cable is properly connected (USB printers)
- Check printer is powered on and fully booted
- Restart both computer and printer
- Try different USB port (USB printers)
- Verify WiFi connection (wireless printers)
- Check printer IP address is correct (network printers)
Can't Print After Installation
- Verify printer is set as default printer
- Check printer has paper and ink/toner
- Clear print queue and restart printer
- Reinstall printer drivers
- Check printer is not in error state
- Verify network connectivity (wireless printers)
Wireless Connection Drops
- Move printer closer to router
- Reduce interference from other devices
- Update printer firmware
- Assign static IP address to printer
- Check WiFi signal strength
- Restart printer and router
Post-Installation Setup and Configuration
Set as Default Printer
Windows:
- Go to Settings > Devices > Printers & Scanners
- Select your printer from the list
- Click "Manage" and then "Set as default"
Mac:
- Go to System Preferences > Printers & Scanners
- Select your printer from the list
- Click "Default printer" dropdown and select your printer
Configure Print Settings
- Access printer properties through Control Panel (Windows) or System Preferences (Mac)
- Set default paper size (Letter, A4, etc.)
- Configure color settings (color, grayscale, black & white)
- Set default print quality (draft, normal, high)
- Enable two-sided printing if available
- Configure paper source preferences
Install Additional Software
- Printer management utility for monitoring ink/toner levels
- Scanning software (if printer has scanner)
- Mobile printing apps (HP Smart, Canon Print, Epson iPrint)
- Firmware update tools
- Network configuration utilities
Maintenance Tips for Optimal Performance
- Regular Cleaning: Clean printer exterior and paper path monthly
- Firmware Updates: Check for and install firmware updates quarterly
- Driver Updates: Update drivers when new versions are available
- Paper Quality: Use recommended paper type and quality
- Ink/Toner Management: Monitor levels and replace when needed
- Power Management: Use sleep mode to extend printer life
- Network Stability: Ensure stable WiFi connection for wireless printers
- Dust Prevention: Keep printer in clean, dust-free environment
When to Seek Professional Help
Consider professional assistance if:
- Installation fails after multiple attempts
- Printer is not detected by any computer
- Hardware malfunction is suspected
- Network configuration is complex
- You need help with advanced features
- Printer requires specialized setup
- You need network-wide printer sharing configuration
Conclusion
Adding a printer to your computer is a straightforward process when you follow the proper steps. Whether you choose a USB, wireless, Bluetooth, or network connection, the key is to:
- Select the right connection type for your needs
- Download the correct driver from the manufacturer
- Follow the installation steps carefully
- Test the printer immediately after setup
- Configure default settings for your preferences
- Maintain the printer regularly for optimal performance
By following this comprehensive guide, you should be able to successfully add any printer to your computer and start printing right away.
📞 Need Professional Help? If you're experiencing printer installation issues or need assistance with network printer setup, our IT consultancy team can provide expert guidance. Contact us today for professional printer installation and configuration services.
⚖️ Disclaimer: This guide is provided for educational purposes. While we strive for accuracy, printer setup can vary by model and manufacturer. Always consult your printer's official documentation and support resources. Avenqube is not responsible for any issues resulting from following this guide. For official support, contact your printer manufacturer.
Expert Consultation
Get professional guidance from our IT experts for your printer setup needs.
Consult with ExpertInstallation Guide
View our comprehensive printer installation guide with step-by-step instructions.
Open Installation PageSetup Guidance
Learn about professional printer setup and networking solutions for your office.
Printer Setup Guidance